Making the Web Service:
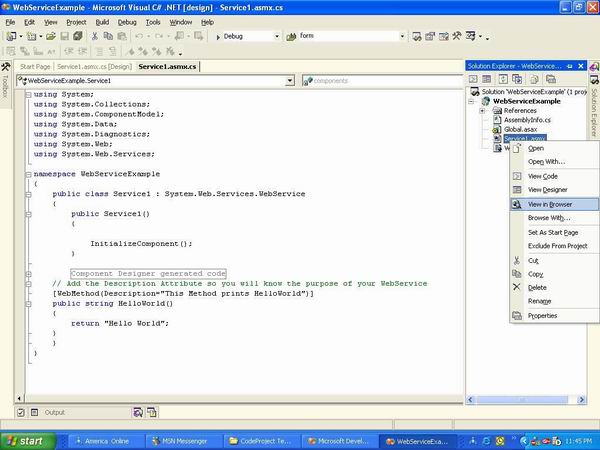
First, start your Visual Studio .NET, and in the project type, select ASP.NET Web Service. In the left pane, choose the language of your choice. In this example, I will be using Visual C#.NET. Once you select the project, a page will appear which will be more like a design page, switch to its code view. In the code view, you can see lot of comments and C# code already written for you. You will also see that at the bottom, there is a method HelloWorld which is written for you by default, so you can test your service and of course say hello to the world. After removing the unwanted code and comments, your code will look like this:
using System; |
Let's dig into this small code. [WebMethod] Attribute denotes that this method will be used by the clients, also this method has to be public in order for a client to use it. Description inside the WebMethod Attribute just gives the method more meaning. Don't worry about the InitializeComponent() method since it's written by default.
Running the Web Service:
OK, now you have made your first kick ass Web Service (without even writing a single line of code). Let's run it and check whether it gives the correct result or not. In the Solution Explorer, right click on the .asmx file, and select View in Browser as shown below:
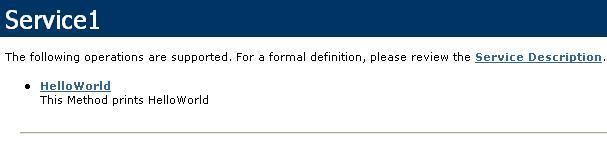
Once you click on "View in Browser", the next screen you will see will be something like this:
Below, you can see the method HelloWorld and the description you wrote for the method.
Now, click on the HelloWorld method.
Alright, so far so good. Now, just press the Invoke button to see the result of your method named HelloWorld().
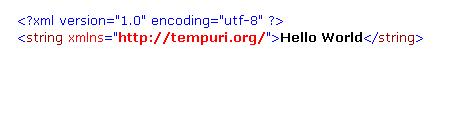
You have just tested your first Web Service and it ran since you didn't coded it. I know what you are thinking right now. Is the client going to see the result like this strange format (this is XML format). Well, of course not. That's why you need to make a Proxy class which consumes this service.
Making a Proxy Client:
Let's make a Console application which consumes this service. You can use any language and platform to consume this service, that's the purpose of XML Web Service. Now, this procedure requires some mouse clicking :). So I will write down the steps instead of pasting the screen shots.
- Start a new project which will be a Console Application in Visual C#.NET.
- Once you see the code view in the Console application, right click on the project name from the Solution Explorer. Remember that project name will be written in bold.
- Click on "Add Web Reference".
- Paste the URL of your Web Service. You can get the URL of your Web Service when you view your web Service in IE or any other browser.
- Click GO.
- Your Web Service will be loaded. In the Web Reference Name textbox, write "MyService" and click Add Reference.
- You will see that the web reference has been added in your Solution Explorer, meaning that Web Service is ready to kick some butt.
Now, all you have to do is to make the instance of the Web Service class using the reference name that you provided, which is "MyService".
using System; |
And that's it. You use the Web Service class just like any other class. Something you need to keep in mind is that if you decide to make a new method in your Web Service and want to make it available to the client, then always remember to build your Web Service solution so that the assembly can be updated. If you don't build your Web Service, you won't be able to see the methods on the client side.
| ||||
No comments:
Post a Comment